vrijdag 15 juni 2018

Krafty Peeks day 2: Merlinda Mermaid en Sassy Sophie

Hallo Everybody,

Welcome to Day THREE of our May Krafty Peeks at Kraftin' Kimmie Stamps!


We have TWO new stamp sets from artist Annie Rodrigue and these are the very LAST images from this artist.

As she has chosen not to do stamps anymore and has ended her contract, we can no longer restock/reorder ANY of her stamp sets. Once ANY of the sets in the Annie category in the shop sell out, they are gone for GOOD so be sure to snap them up!


The first one is Merlinda Mermaid


And the second set is Sassy Sophie
I made a card using Sassy Sophie, used products: Echo Park papers, washi tape, Die-Namics cause for celebration, rhinestones, enamel dots.


From with cardstock i cut a topfold card size 13 x 11. I glued a piece of designpaper from the Echo park pack on to it. I cut the word 'happy" from black cardstock and stamped the sentiments with wicked black. I cut them out with my knife and ruller. On the right corner i did some washi tape and glued one of the sentiments on to is and finished of with some rhinestones and enamel dots.


Out  of Neenah paper i cut a rectangle and then i cut a diagonal line. With Wicked Black i stamped Sophie and colored her using my Copic Markers. I cut a piece of red cardstock just a tat bigger and glued the image on to it. I adhered everything to the base card using 3-d tape. Glued the word and the sentiment on to the card and finished off rhinestones and enamel dots.

Have a nice day!

Greetz, Marieke

The Sketchy Challenge - Half way reminder

Hallo allemaal/ Hello Everybody,

We are half way this months sketch on The Sketchy challenge. This month it's a sketch month, but you are not obligated to use the sketch you can always go for the Anything Goes theme.

Used products; Maja Design papers, Kraftin' Kimmie Furry Holiday Wishes, echo park enamel dots, Die-Namics slanted sentiment strips, Die-Namics stitched circle stax. 


The base is a double folded white card. I glued some matching designpapers on to them i followed the sketch and made a strip out of red designpaper. I finished it off with some enamel dots.


I stamped the mouse from the furry Holiday Wishes and colored him using my Copic Markers, i ended up die cutting him with a stitched circle.


I made some banners using designpapers and glued them together on the top of the card, i stamped the sentiment and die cut it using the slanted sentiment die. I used the die two more times this time from designpaper and glued them on the card. I finished everything off using enamel dots.

Have a nice day!

Greets, Marieke

Met het kaartje doe ik graag mee met de volgende challenge's:
ABC Christmas Challenge - M is for Mouse

donderdag 14 juni 2018

Krafty Peeks day 1: Sweet as can bee + new Krafty ink Kolors

Hello all,

Welcome to Day ONE of our June release of 2018 at Kraftin' Kimmie Stamps!

Today we are starting with the June release and today we are showcasing  stamp set by artist Becky Peace called Sweet as can bee! Also with this new release we have two brand NEW Krafty Kolours Hybrid Inks!!


Used Products: Cute as can be stamp, Die-namics stitched triple peek a boo window & edge, Die-Namics blueprint 13, black and white striped paper pack, black and white cardstock.


I die cut two piece of white cardstock with the rectangle die from blueprint 13. One of those i also die cut with the die-namic peek a poo window and put it aside. With a blending tool en the Yummy Yellow i blended some yellow onto the cardstock. I took Marvelous Mocha and mixed it with water and splattered it onto the cardstock. 


I stamped the Bee's and colored them up with my Copic Markers, then i fussy cut them leaving a white line around them. I put everything in place and stamped the bee lines onto the cardstock also the sentiment i stamped on there. I glued the bees on to the card and glued everything together. I glued it onto a piece of black cardstock and eventually a small piece of designpaper.

Have a nice day everyone!

Greetz, Marieke

Met het kaartje doe ik graag mee met de volgende challenge's:
Addicted to stamps - Black, White and one more color
Knutsels en Kadootjes - CAS
Simon Says Wednesday Challenge - Frame it

dinsdag 12 juni 2018

June My Favorite Things and friends

Hallo allemaal / Hello everyone,

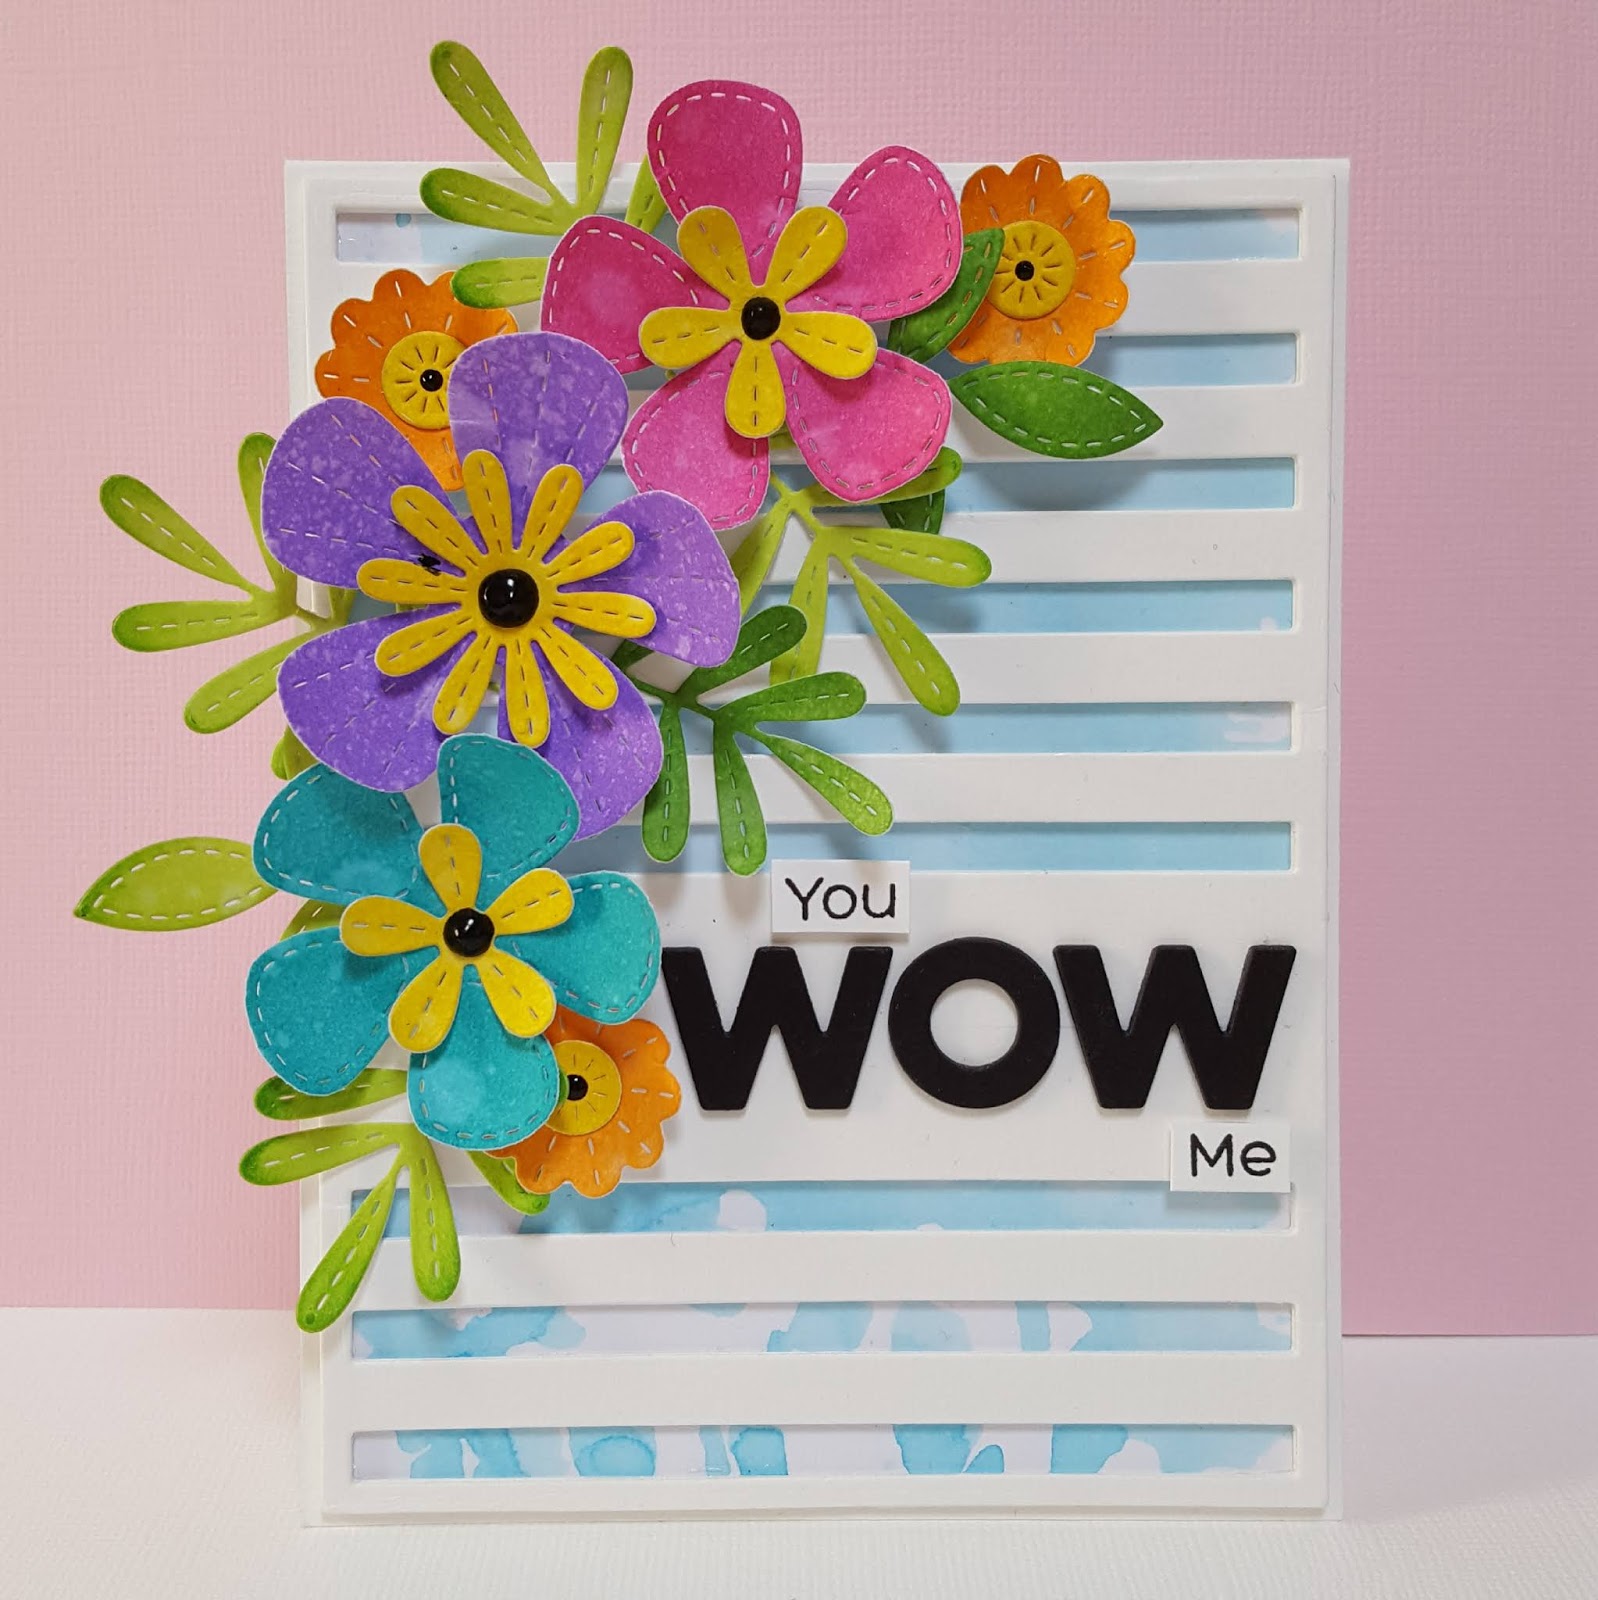
I'm so honored to be a part of the MFT & Friends June release as their June guest designer, i was so excited when they asked me to join in for this month, i had a smile on my face for a very long time!

This month we had a a very versatile release today i will be showcasing a card using a few of the June release items.


First of i die cut the Die-Namics Striped sentiment strip cover-up four times out of white cardstock. I glued those together so it became a solid panel. I put the cover aside and made a background using Salty Ocean distress ink mixed with water, heat set it and glued it behind the cover up.

With Pickled Raspberry, Peacock Feathers, Mustard Seed, Wilted Violet, Twisted Citron, Mowed lawn and Spiced Marmalade distress ink on some stamping paper and splattered some water on it. Then i die cut some flowers and leaves with the Die-Namics Stitched Blooms. I glued the flowers together and finished then of with some Nuvo Crystal drops Ebony Black.

  
The cover up i glued onto a top fold white card, then i arranged my flowers and leaves and glued them on to the panel.

Out of black cardstock i die cut the Die-Namics Wow four times and glued them together, adhered the word on the big part of the panel. I cut the words you and me apart from the whole sentiment from the You wow me stampset. Then i stamped them using the Black Licorice Hybrid Ink, i cut them out using scissors and glued them on to the panel using 3-d tape.


Thanks for hopping by, i hope i inspired you!

Greets, Marieke

donderdag 7 juni 2018

Gastdesigner Cheerful Sketches Challenge

Hallo allemaal,

Vandaag een kaart voor jullie als gastdesigner voor het Cheerful Sketches Blog. Er is de eerste van de maand weer een leuke schets gestart en vandaag is het aan de guestdesigners om jullie te inspireren.

Gebruikte producten; Maja Design papers, naaimachine, joy crafts stempel, Wild Rose Studio stans, Marianne Design stansen, twine en Bugaboo stempel - Kidz Lily ladybug flower


Het is een dubbele witte kaart van 13,5 x 13,5. Ik sneed eerst de stukken cardstock op maat evenals het designpapier. Ik plakte het op elkaar en naaide met mijn naaimachine een stikrandje.


Stanste de vlinder en plakte het aan elkaar ik plakte er een bloem op om het geheel af te maken. De tekst stempelde ik op wit cardstock en knipte ik daarna uit. Ik maakte een bloementoef links van bij de tekst.


De digi stempel printe ik uit en kleurde ik in met mijn Copic Markers. Ik knipte daarna de bloem op de rand uit zodat ik het daarna met een cirkel stans kon stansen. Ik plakte alles op een cirkel stans van Marianne Design.

Gebruikte Copic kleuren:
Paars - RV99, RV95, RV93, RV91
Groen - YG67, YG63, YG61
Haar - E37, E35, E33
Huid - E000, E00, E21, E11, E04, R20
Rood - R29, R27, R24
Zwart - BV29, BV25, BV23
Geel, Y38, Y19, Y17, Y15


Fijne dag allemaal!

Groet, Marieke

Met het kaartje doe ik graag mee met de volgende challenge's:
I'm Roses Challenge Blog - R8, R5, R3, LY3, LY1, BP/T30, S3, S10
Crafter's Cafe - Tic/Tac/Toe - Middle horizontal line

zaterdag 2 juni 2018

Dinosaur pop up card

Hallo allemaal,

Vandaag een kaart voor jullie die ik een tijd geleden maakte op bestelling, de schoonmoeder van mijn beste vriendin wilde een kaart voor haar kleinzoon en omdat het om mijn grootste kleine vriend ging heb ik uiteraard mijn stinkende best gedaan.

Gebruikte producten; Delightful Dinosaur stempel en stans, Die-Namics beach scene, Die-namics volcano, Die-namics stitched snow drifts, Die-namics grassy fields, Die namics mailbox, stencil mini clouds, Paid patterns paper pack, interactive labels stempel en twine.


Maakte een basis kaart en volgende de beschrijving van de pop up card van The Unpampered Stamper voor de onderkant. Om de onderkant wat te breken maakte ik er water op met the beach scene stans. Ik had geen bergen en gebruikte de snowdrift stans als berg. Ik bewerkte dit met witte en zwarte geso. 


Op de andere zijde maakte ik een slider vulkaan deze kleurde ik zelf met mijn Copic Markers. Het gras en de stenen kleurde ik ook met Copic markers voordat ik ze uitstanste. De dino's stempelde ik en kleurde ze daarna in. Ik stanste alles uit en gaf alles "pootjes" en maakte sneetjes op het onderste plateau. Om de ruimte te vullen tussen beide kanten maakte verschillende niveau's gras zodat het niet meer zichtbaar was.


De gehele kaart bewerkte ik met designpapier en tussen de basiskaart en het designpapier deed ik wat twine zodat je de kaart dicht kan strikken.

Gebruikte Copic kleuren:

Stenen - C7, C5, C3
Vliegende Dino - N10, N8, R59, R39, R29, R27, R24, YG99, YG97, YG95,
Gele Dino - Y17, Y15, Y13, Y11, B18, B16, B12, W7, W5, W3
Groene Dino YR23, YR16, YR12, G02, G05, G07. G09, N10, N8
 Blauwgroene dino - RV17, RV14, RV11, BG49, BG18, BG15, BG13, W7, W5, W3
Blauwe Dino - B18, B16, B14, B12, N10, N8
Gras - YG17, YG13, YG11
Vulkaan - E57, E55, E53, E51, Y38, R59, R27, R24, R22.

Fijne dag allemaal!

Liefs, Marieke

Met het kaartje doe ik graag mee met de volgende challenge's:
As you Like it - Flora or Fauna, that's a really though choice but i go Fauna because i love to create scene's.

vrijdag 1 juni 2018

Copic Colourstock - How to; Copic colouring no lines skin tone

Hallo Copic fans,


Vandaag heb ik voor jullie een video tutorial waarin ik laat zien hoe je een
huid in kunt kleuren op de No Line techniek. Vandaag laat ik jullie zien hoe je de huid in kleurt. Voor de tutorial gebruikte ik; E000, E00, E04, E11, E21 en R20.

Ik ging aan de slag met een rubber stempel van Magnolia Summer Flower Tilda with bowknot. Ik stempelde haar met Cement Grey hybride ink van My Favorite Things dit kan overigens ook prima met een andere lichte kleur inkt die geschikt is voor Alcohol Markers. Veel kijkplezier.


Hierbij de volledige uitwerking van Tilda. Ik heb er een tag mee gemaakt omdat ik vaak vindt dat de No Line techniek genoeg voor zichzelf spreekt.


Hopelijk vonden jullie de video tutorial leerzaam en zie ik op de Colourstock Facebookpagina snel jullie verschillende No Line afbeeldingen voorbij komen, tot de volgende tutorial!


Met de gifttag doe ik graag mee met de volgende challenge's:
Magnolia-Licious - Anything Goes
Magnolia Forever - Flowers