Hallo Allemaal,
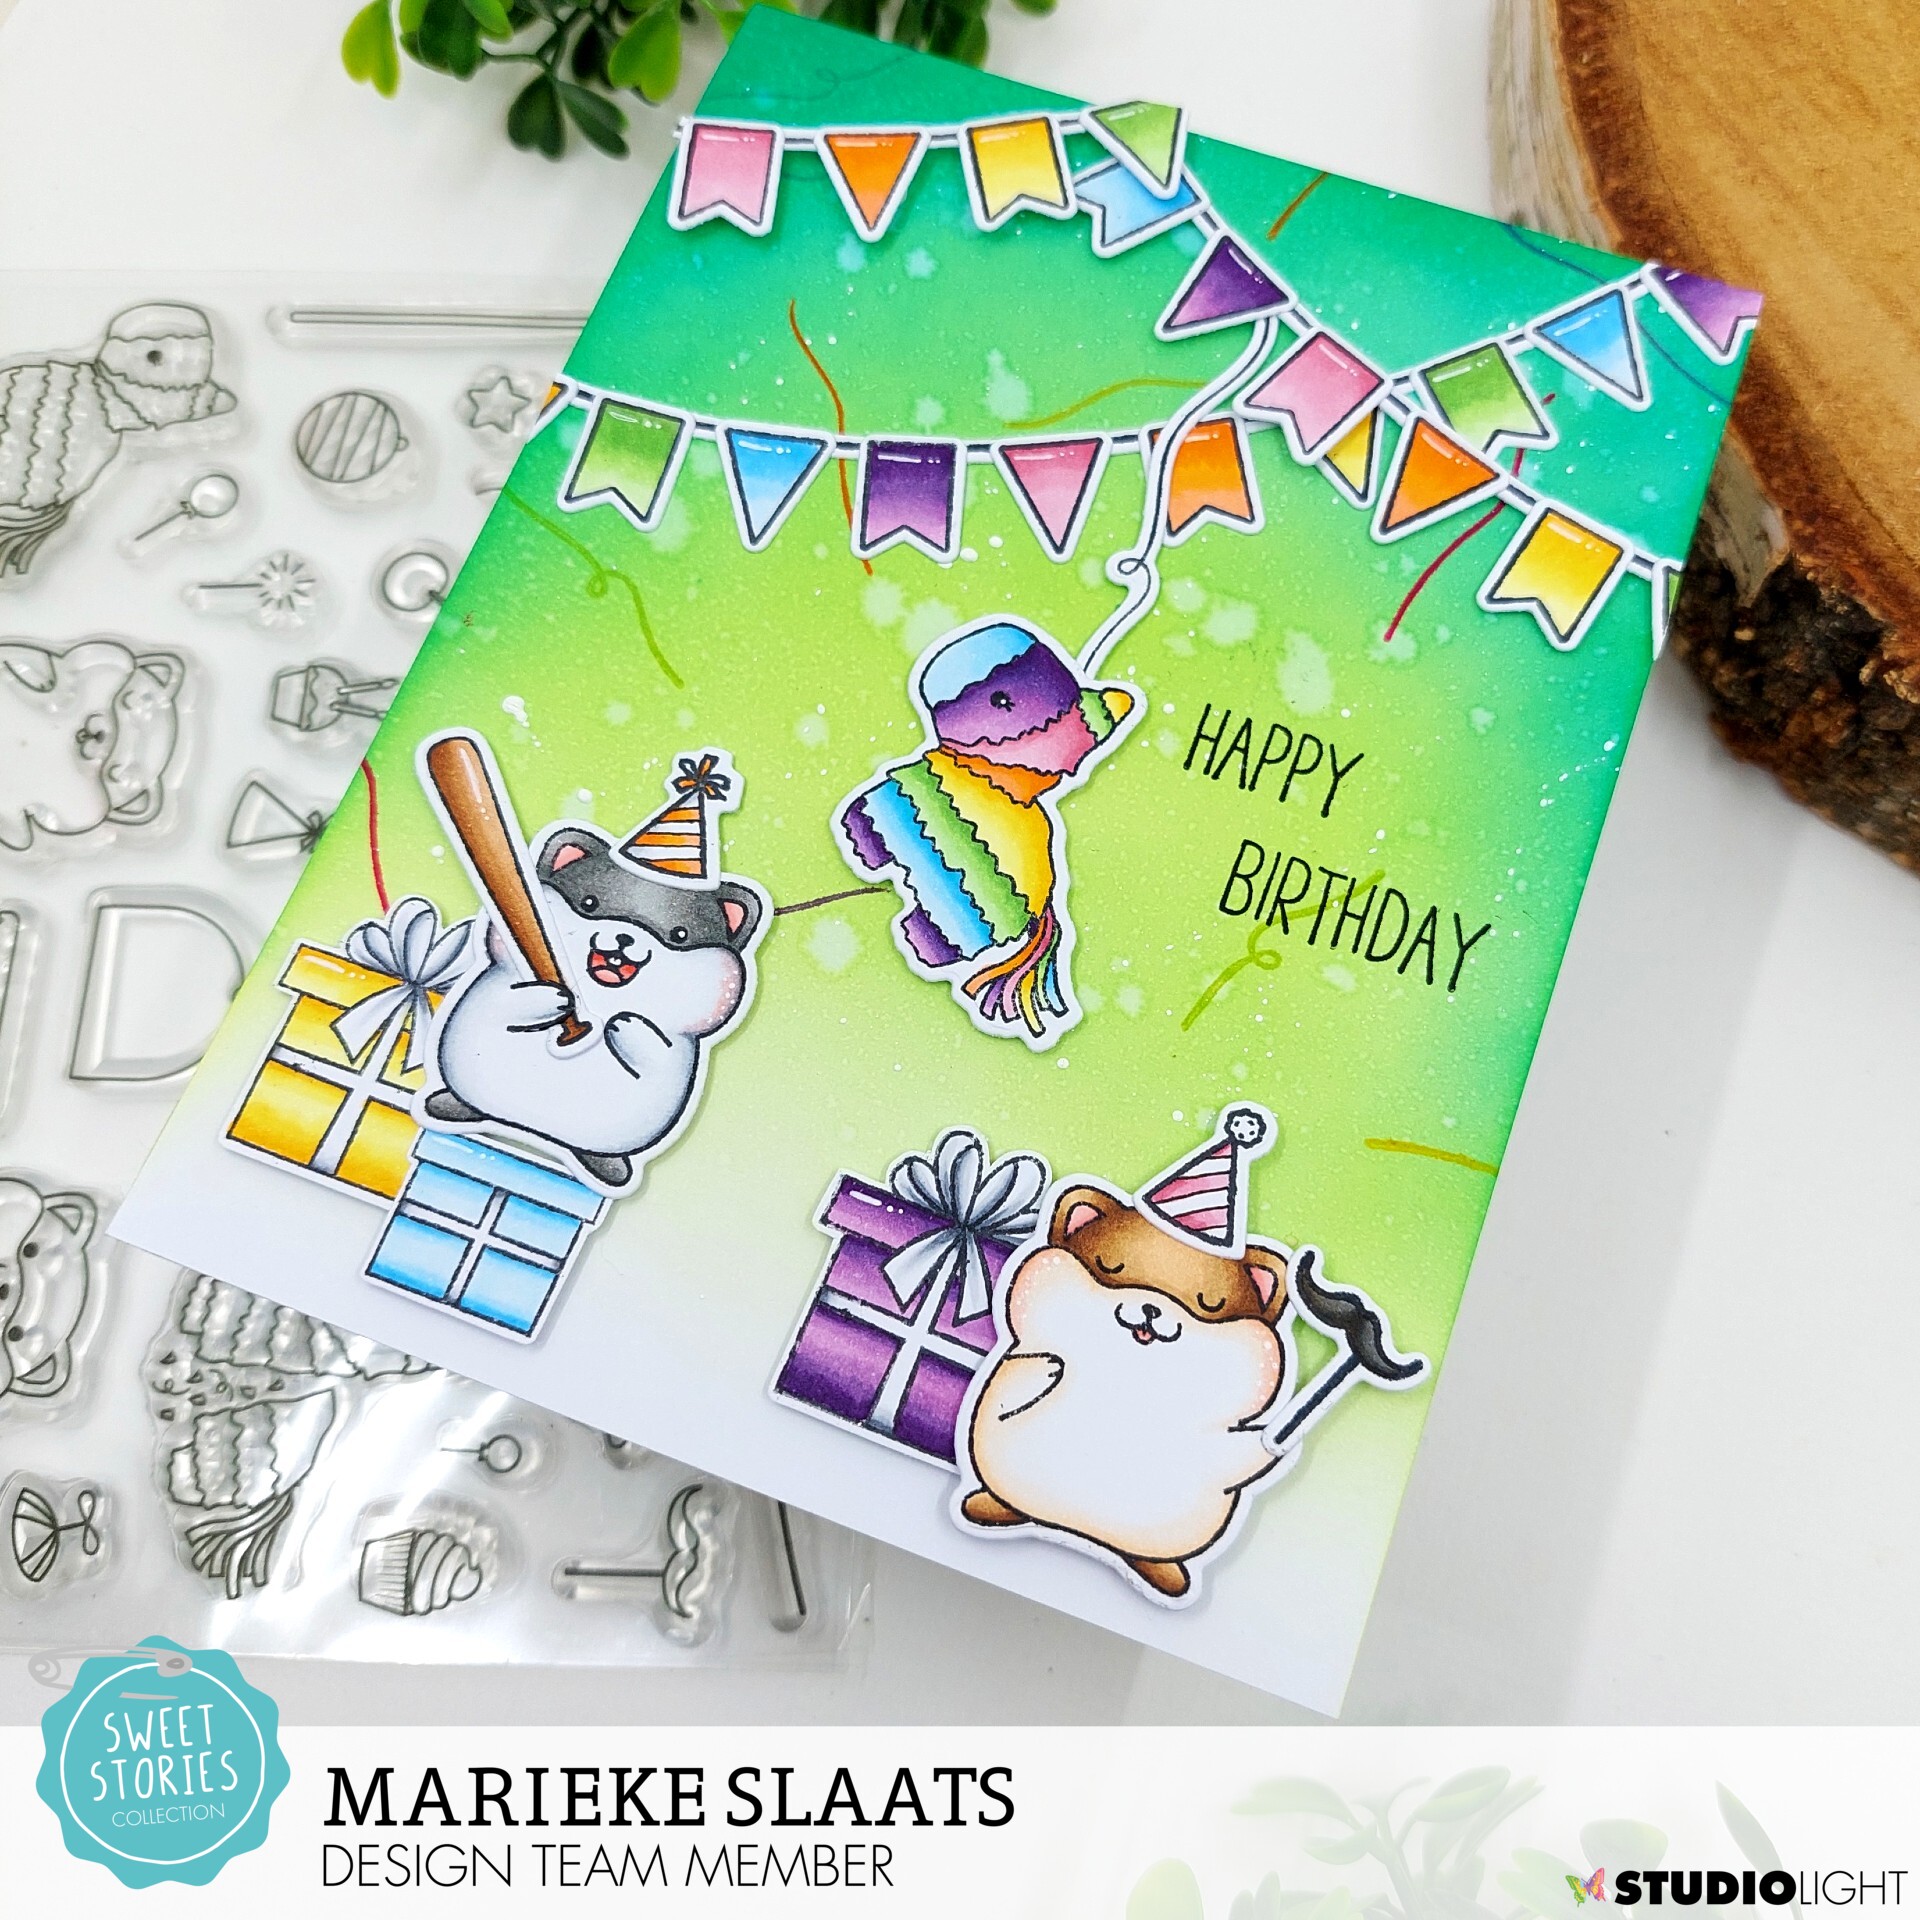
Hier is mijn wekelijkse post voor Studio Light weer. Deze keer maakte ik met de Sweet Stories producten een shaker kaart, ditmaal kwamen de tijgers weers eens in actie. I'm back with my weekly post for Studio Light. This time around I decided on making a shaker card using a few of the Sweet Stories products.

Zoals altijd maakte ik eerst de achtergrond, inktblende Stormy Sky en Faded Jeans. Spetterde water en plakte het stencil op de kaart. Inktblende de regendruppels met Chipped Sapphire. Sneed twee witte en een designpapier rechthoek en plakte dit tot een topfold basiskaart.
As usual I started on the background first, inkblended Stormy Sky and Faded Jeans. Splattered some water en adhered the stencil onto the card. Added the raindrops on the card using the stencil and Chipped Sapphire Distress ink. Die cut two white and one pattern paper rectangles and adhered them together to create a topfold basecard.

Sneed een strookje grijs cardstock en heat emboste hier twee keer de puddels op. Plakte het op de kaart en stanste de wolk uit het geheel. Stanste de wolken en sneed een rechthoek. Inktblende deze beide en plakte de rechthoek op de basis. Vulde de shaker, plakte de blister aan de rechthoek vast en plakte hem dicht.
Cut a strip of gray cardstock and heat set the two puddles. Added it onto the card and die cut the large cloud. Die cut two small clouds and a cut a rectangle inkblended it using Distress inks. Adhered the rectangle on to the card. Glued the blister on the inside of the inked panel. Filled the shaker and closed it.

Stempelde alle afbeeldingen, kleurde ze in met mijn Copic markers en stanste ze uit met de bijpassende stansen. Heat emboste beide teksten en stansten of knipte deze uit. Plakte alles aan de voorzijde van de kaart met foam tape of lijm. Stamped all the images, colored them up using my Copic markers and cut them using the matching dies. Heat set both sentiments and die cut or cut them using my sciccors. Adhered everything on the front of the card using foam tape.
Gebruikte Copic Kleuren:
Gebruikte Copic Kleuren:
Tijgers - E09, YR27, YR24, YR21 / N7, N5, N3/ W5, W3, W1, W00, 0 / R20, R00
Geel - Y17, Y15, Y13, Y11, Y00
Wit / Grijs - C5, C3, C1, C00, 0
Wit / Grijs - C5, C3, C1, C00, 0
Zwart - N7, N5, N3
Heb een heerlijke dag!
Groet, Marieke
Groet, Marieke
Stempels: SL-SS-SCD47, SL-SS-SCD49, SL-SS-STAMP270, SL-SS-STAMP329, SL-SS-STAMP419
Stansen: SL-SS-SCD47, SL-SS-SCD49, SL-SS-CD459, SL-SS-CD460, SL-ES-CD494
Inkt: Memento Tuxedo Black, Tsukineko Versamark, Stormy Sky/ Faded Jeans en Chipped Sapphire Distress inkt
Papier: Smooth White, Lemon Drop, Black Licorice SL-ES-PP51, CCL-FR-PP83
Extra: Wit embossingpoeder, SL-ES-MASK150, SL-ES-BLIS11, SL-ES-SHAKE01, SL-ES-SHAKE03