Hello all,
Today i'm pleased to be guestdesigning for the Create a Smile Stamps challenge blog. Two weeks ago i was picked as a featured designer and i was asked to be a guest designer for this challenge. I always say yes so did i for this one. Vandaag mag ik guestdesigner zijn voor Create a Smile Stamps challenge blog. Twee weken geleden was ik als featured designer uitgekozen en werd ik gevraagd als gastdesigner. Ik zeg nooit nee dus ook deze keer niet.
This week we challenge you to create a card with a moodboard. You have to use atleast one Create a Smile product as a focal point and you can play along! If you do not own anything you can always try to create something with one of there Freebies.


Deze week dagen we je uit om een project te maken met bovenstaande moodboard. Je kunt meedoen zolang je er maar voor zorgt dat een Create a Smile product de hoofdrol heeft. Ben je nu nog niet in het bezit van een van deze leuke producten dan kun je altijd kijken of je iets kunt maken met een van deze Freebies.
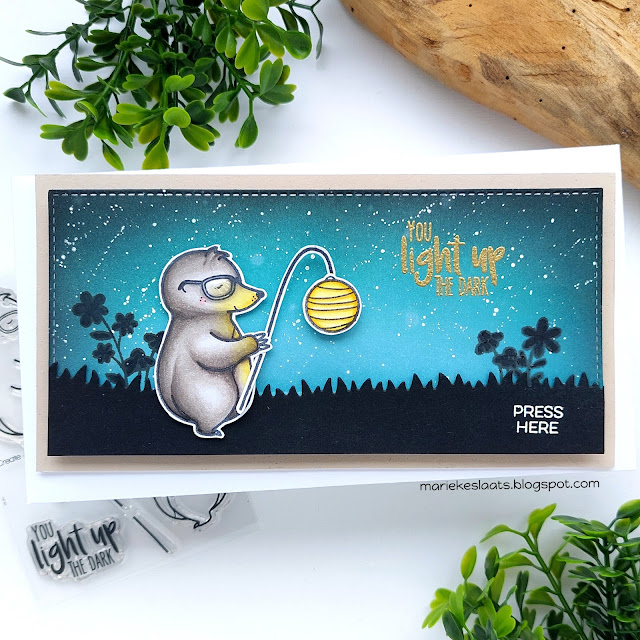
So for this challenge I decided on making a card using the Light up the dark and make a light mechanisme behind the lantern. First I made the background using Speckled Egg, Evergreen Bough and Black Soot Distress ink. Splattered some water and white paint and cut it using a stitched rectangle die.
Voor deze challenge besloot ik een kaart te maken met de Light up the dark en dan een licht mechanisme achter het lantaarntje te maken. Ik maakte eerst de achtergrond met Speckled Egg, Evergreen Bough en Black Soot Distress inkt. Spetterde water en witte verf en stanste het geheel uit met een gestikte rechthoek stans.
Die cut a border of grass and stamped the flowers on the background, colored them up using my Copic markers. Heat set the sentiment on to the background. Stamped the images, colored them up using my Copic markers and cut them by hand.
Stanste een border met gras en stempelde de bloemen op de achtergrond. Kleurde de bloemen in met mijn Copic markers en heat emboste de tekst op de achtergrond. Stempelde de afbeeldingen, kleurde ze in met mijn Copic markers en knipte ze daarna uit.
Decided were I wanted the lights to be and punched three small holes in the background. Adhered the mechanisme on the back of the card and heat set the sentiment on the grass were the light switch is. Assembled the card and adhered it onto a topfold Neutral cardbase.
Besloot waar de lampjes moesten en maakte drie kleine gaatjes in de achtergrond. Plakte het mechanisme op de achterkant van de achtergrond en heat emboste de tekst op het gras waar het druk mechanisme onder komt. Plakte alles op de kaart en het geheel ging op een topfold Neutral basiskaart.
Used Copic Colors:
Mole - W8, W6, W5, W4, W3, W1,W00, R20
Lantern - Y17, Y15, Y13, Y11
Light - Y02, Y00, Y000
Black - N8, N6, N4
Have a wonderful day!
Greets, Marieke
Stamps: Light up the dark (Create a Smile Stamps), Interactive Labels, Spring Gnomes (My Favorite Things)
Dies: Grassy Fields, Stitched Mini Slimline STAX Die-Namics
Ink: Memento Tuxedo Black, Tsukineko Versamark, Speckled Egg/ Evergreen Bough and Black Soot Distress ink.
Paper: Smooth White, Black Licorice, Neutral
Extra: Pearblossom Press Lights, Gold embossing powder, white embossing powder, white paint marker.
very cute!
BeantwoordenVerwijderen