Hallo Allemaal,
Hier is mijn wekelijkse post voor Studio Light weer. Deze keer maakte ik met de nieuwe Sweet Stories Kerst release een shaker kaart. I'm back with my weekly post for Studio Light. This time around I decided to making a shaker card using the new Sweet Stories Christmas release.

Zoals altijd maakte ik eerst de achtergrond. Inktblende de kleuren Wilted Violet, Blueprint Sketch, Chipped Sapphire en Black Soot Distress inkt. Spetterde water en witte inkt. Stanste de bomen rand uit groen, kraft en wit cardstock, maakte het tot een geheel en plakte het op de achtergrond.
As always I made the background first. Inktblended the colors Wilted Violet, Blueprint Sketch, Chipped Sapphire en Black Soot Distress ink. Splattered some white paint and water. Die cut the tree border out of green, kraft and white cardstock and made it into one, before glueing it onto the background.

Maakte het shaker element en plakte het geheel op een zwarte topfold basiskaart. Stanste de sneeuw uit en bewerkte dit met mijn Copic markers. Heat emboste de teksten. De kleine op cardstock de grote tekst op vellum. Stanste en knipte dit uit en plakte op de kaart.
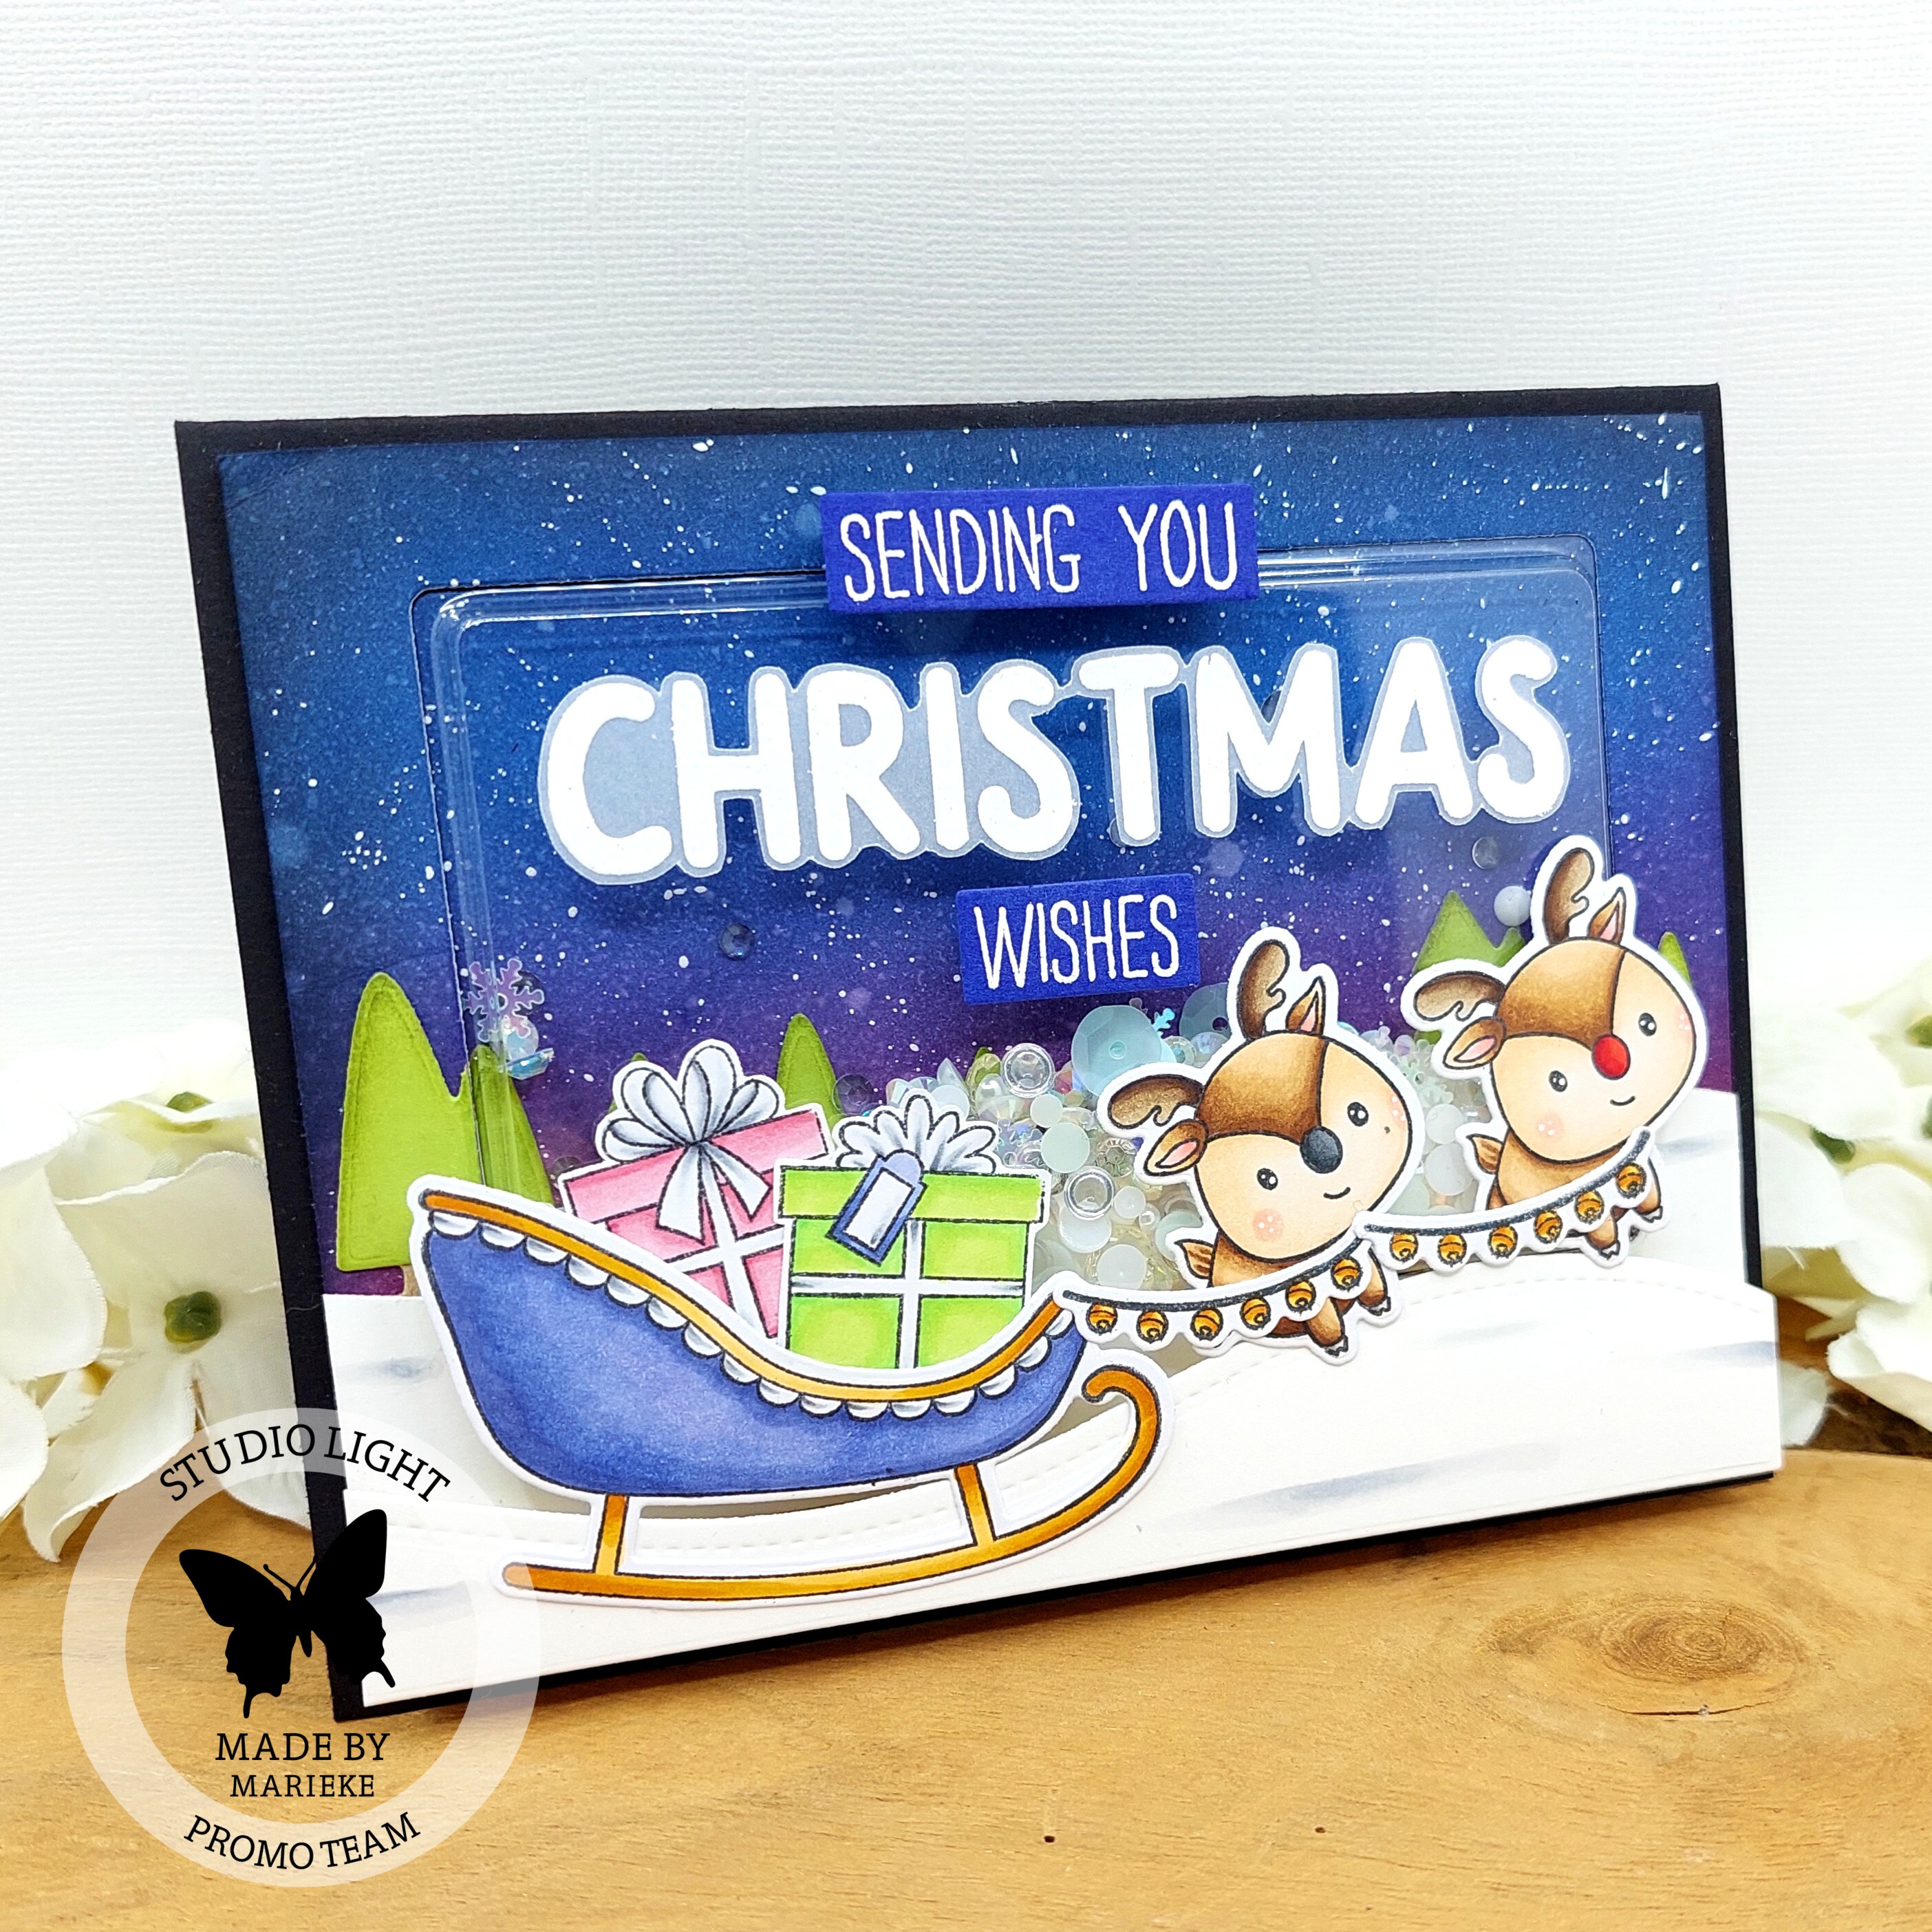
Stempelde alle afbeeldingen, kleurde ze in met mijn Copic markers en stanste ze uit met de bijpassende stansen. Plakte alle afbeeldingen en de teksten op de kaart en deze was helemaal klaar. Stamped all the images, colored them up using my Copic markers and cut them using the matching dies. Adhered them on the card together with the sentiments and my card was done.
Gebruikte Copic Kleuren:
Rendieren - E59, E57, E55, E53, E51, E50 / N8, N6, N4 / E44, E43, E42 / R20, R00 / W5, W3
Rood - R29, R27, R24
Groen - YG25, YG23, YG21
Wit - C5,C3,C1, C00, 0
Paars - BV17, BV04, BV13, BV02, BV00
Goud - YR27, YR24, YR23
Roze - R85, R83, R81
Heb een heerlijke dag!
Groet, Marieke
Stempels: SL-SS-SCD51, SL-SS-STAMP294, SL-SS-STAMP295
Stansen: SL-SS-SCD51,SL-SS-CD429, SL-ES-CD180, SL-SS-CD394
Inkt: Memento Tuxedo Black, Tsukineko Versamark, Wilted Violet/ Blueprint Sketch/ Chipped Sapphire/ Black Soot Distress inkt.
Papier: Smooth White, Black Licorice, Kraft, Sour Apple, Blueberry, Vellum.
Papier: Smooth White, Black Licorice, Kraft, Sour Apple, Blueberry, Vellum.
Extra: Wit embossing poeder, witte verf marker, SL-ES-BLISS04
.jpg)

.jpg)
.jpg)


.jpg)
.jpg)
.jpg)


