zaterdag 28 november 2020

Kraftin' Kimmie Saturday Challenge - Use the colors Red/Green or Blue/Purple

 Hallo allemaal / Hello everybody!

Today it's Saturday wich means a new challenge started over at Kraftin Kimmie Stamps Blog, today the theme is make a card or project to use either Green and Red or Blue and Purple!. You can go every route with this so get your stamps, ink and stencils out and play along. Vandaag is het zaterdag dat betekend dat er een nieuwe challenge begonnen is op het blog van Kraftin' Kimmie Stamps. Het thema van deze week is maak een kaart of project en gebruik daarop de kleuren Rood en Groen of gebruik de kleuren Blauw en Paars. Je kunt er alle kanten mee op dus pak je stempels, inkten en stencils en speel mee!
For my card i cut a topfold white basecard, cut a strip of designpaper added it to the right. Cut a piece of Copic paper, colored the floor using my Copic markers. Stamped the image, colored it up using my Copic markers and cut it using the Brother Scan & Cut. Added everything to the base card. Voor mijn kaart sneed ik een topfold witte basiskaart, sneed een strip designpapier en plakte dit op de rechterkant. Sneed een stuk Copic papier, kleurde de vloer in met mijn Copic markers. Stempelde de afbeelding, kleurde deze in met mijn Copics en sneed hem uit met mijn Brother Scan & Cut. Plakte alles op de basis kaart.
Cut some small strips out of designpaper, added it to the top of the card. Stamped the sentiment on the basecard using Marvellous Mocha en finished the card of using Enamel Dots. Stanste smalle strips designpapier, plakte deze op de bovenzijde van de kaart. Stempelde de tekst met Marvellous Mocha op de basiskaart en werkte het geheel af met Enamel Dots.


Have a lovely day!
Greets, Marieke

Dies: Slanted sentiment strips Die-Namics
Paper: Smooth White, Echo park pattern paper

You are invited to the Inlinkz link party!

Click here to enter

donderdag 26 november 2020

My Favorite Things - Color Challenge #154

 Hello all!

Today i'm here with a new Color Challenge by My Favorite Things. This challlenge i decided to go for a Christmas card because i really need a few more Christmas cards this year. Vandaag ben ik er met een nieuwe kleuren challenge van My Favorite Things. Voor deze challenge heb ik een kerst kaart gemaakt, ik heb echt nog wel een aantal kerstkaarten nodig!
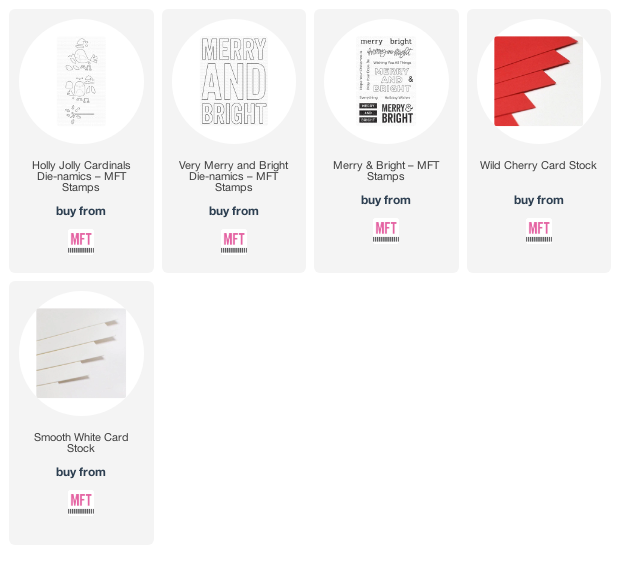
So instead of a traditional Christmas card i went a bit outside the box and made a really colorful one using the Holly Jolly Cardinals Die-Namics. In plaats van een traditionele kaart ging ik ditmaal totaal uit die richting en maakte een heel kleurrijke met Holly Jolly Cardinals.
So for my card i started with the background, i cut a Smooth White rectangle and added the clouds using a stencil and Tickled Pink together with Tropical Teal dye ink. Voor mijn achtergrond stanste ik een Smooth White rechthoek en voegde doormiddel van een stencil en Tickled Pink samen met Tropical Teal inkt de wolken toe.
Using Tickled Pink, Limelight, Wild Cherry and Tropical Teal i cut the letters and added them in the middle of the card. Heat embost the sentiment on to Black Licorice and cut it out. Uit Tickled Pink, Limelight, Wild Cherry and Tropical Teal cardstock stanste ik de letters en plaatste ze in het midden van de kaart. Heat emboste de tekst op Black Licorice and stanste het uit. 

Using Tropical Teal, Wild Cherry, Limelight, Smooth White, Orange Zest and Milk Chocolate i cut the Cardinal, the Christmas hads and there branches. Added some details to the cardinals using a white gelpen. Voor de vogels, takjes en de mutsten gebruikte ik Tropical Teal, Wild Cherry, Limelight, Smooth White, Orange Zest and Milk Chocolate. Plakte alles in elkaar en voegde wat details toe met een witte gelpen.
Added the panel to a Wild Cherry cardbase and added everything to the cloud panel. Plakte de wolken rechthoek op een Wild Cherry basiskaart en plakte alle onderdelen op de kaart.


Have a lovely day!
Greets, Marieke

25 Days of Christmas Tags 2020 Bloghop - My Favorite Things

Hello all,

Today My Favorite Things is participating in the annual 25 Days of Christmas Tags bloghop by Tracey Mc Neely's! If you dont know what the event is all about you can find all the information you wanne know here! Vandaag is het de beurt aan My Favorite Things voor de jaarlijkse 25 Days of Christmas bloghop van Tracey Mc Neely's! Als je niet weet wat het precies inhoud neem dan een kijkje op haar blog!

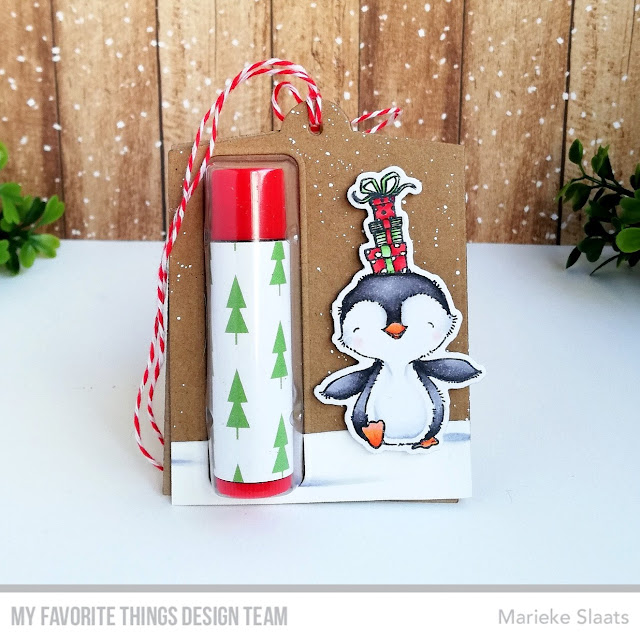
Tags are a great way to present as a little gift and work well with the Lip balm products. So i made two corronsponding tags into one and turned it into a little gift. Tags zijn een leuke manier om iemand een klein cadeautje te geven en je kunt ze leuk combineren met de Lip balm producten. Ik maakte twee dezelfde tags en maakte er één klein cadeautje van.
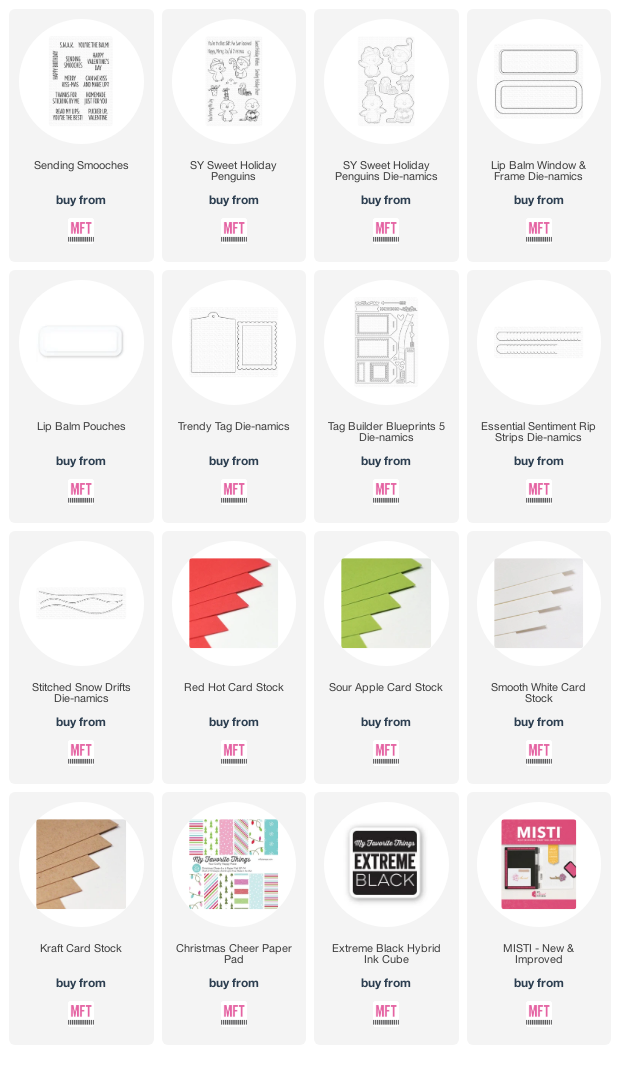
So i cut three Kraft tags and splatterd some white paint on to two of them. For the front i cut the frame out of Smooth White just like the berries. Cut two different colors of green mistletoe and added this to frame. Heat embost the sentiment on to some Red Hot cardstock and cut it using a banner die. Finished of the front making a twine bow. Stanste driee kraft tags en spetterde op twee tage witte verf. Voor de tag aan de voorzijde stanste ik het frame en de berries uit Smooth White. De mistletoe uit twee kleuren groen cardstock en plakte dit in het frame. Heat emboste de tekst op Red Hot cardstock en stanste het uit met de banner stans. Werkte de voorzijde af met een strik van twine.
For the back i cut a strip of Pattern Paper and added this to the lipbalm. Cut the shape out of the tag and temporarly added the tag onto the third one. Traced the part that i die cut out of the other tag. Cut a strip with the Ripstrip Die-Namics on the third tag were the pencil traced part is. On the Back tag i added the pouch, insert the lipbalm and glued the tags together. Cut a piece of snow, added some detail with a Copic Marker. Stamped the penguin, colored it up using my Copic markers and cut it using the matching Die-Namics. With some twine I attached the two tags together. Voor de tag aan de achterzijde sneed ik een strook design papier en plakte dit op de lipbalm. Stanste de vorm uit de tag en plakte het tijdelijk op de derde kraft tag. Met een potlood trok ik het gestanste gedeelte over en stanste een strip met de Rip-Strip Die-Namics. Op de orginele tag plakte ik de pouch, voegde de lipbalm toe en plakte de andere tag op de achterzijde. Stanste een strook sneeuw, bewerkte dit met mijn Copic markers en plakte het op de tag. Stempelde de penguin, kleurde deze in met mijn Copic markers en stanste het uit met de bijpassende Die-Namics. Maakte beide tags aan elkaar door wat gestreepte twine door beide ogen te halen.

Used Copic Colors:
Snow - C3, C1, C00, 0
Black - N7, N5, N3
Orange - YR07, YR04, YR02
Red - R29, R27, R24
Green - YG17, YG13, Yg11
White - C3, C1, C00, 0

Have fun hoping!
Greets, Marieke

zondag 22 november 2020

November release and krafty hop!

Hello everyone!

And the day has come that the November Release by Kraftin' Kimmie stamps is available! For today's inspiration i decided to make a Clean And Simple Card using the Save my PlaceVanaf vandaag zijn de novemberr release producten van Kraftin' Kimmie stamps te koop, welke ga jij halen? Voor mijn inspiratie van vandaag maakte ik een Clean And Simple kaart met de Save my Place.
So for my card i started using some water colors on some water color cardstock, i blended the ink with water and made the splashes. Cut it using a circle die. Voor mijn kaart maakt ik een achtergrond met water verf op aquarel papier, ik blende inkt met water en maakte de vlekken. Stanste het geheel uit met een cirkel stans.
Cut a topfold Smooth White cardbase, splattered some of the same ink colors and some black paint. Added the circle to the panel and cut it straight. Heat embost the sentiment on to black cardstock and die cut it with a speech bubble. Sneed een topfold Smooth White basiskaart, spetterde wat van dezelfde inkt kleuren op de kaart en wat zwarte verf. Heat emboste de tekst op zwart cardstock en stanste het uit.
Stamped the images, colored it up using my Copic markers and cut it using my Brother Scan & Cut. Finished of the card using some enamel dots and some Glossy Accent on the eye. Stempelde de afbeelding, kleurde het in met mijn Copic markers en stanste het uit met mijn Brother Scan & Cut. Maakte het geheel compleet met wat glossy accent op de ogen en verschillende enamel dots.

Have a lovely day!
Greets, Marieke

Dies: A2 circle staxx Die-Namics, Mama Elephant Slim Card Basics
Ink: Wicked Black, two zig markers, Twisted Citron reinker.
Paper: Smooth White Black Licorice
Extra: Black Paint marker, Enamel dots.

You are invited to the Inlinkz link party!

Click here to enter

vrijdag 20 november 2020

My Favorite Things - Outside the Box Challenge

Hello all,

Today a new Outside the Box challenge has started over at the blog of My Favorite Things! Every four weeks we challenge you to create a Pop-Up box using any of the My Favorite Things Pop up Die-Namics in combination with a theme. This months theme is; Happy Holidays! Vandaag start een nieuwe Outside the Box challenge op het blog van My Favorite Things! Iedere vier weken start er een nieuwe Pop-Up box challenge waarbij we vragen dat je een kaart maakt met een specefiek thema en gebruik maakt van de Pop-Up Die-Namics producten. Het thema van deze maand is; Happy Holidays!
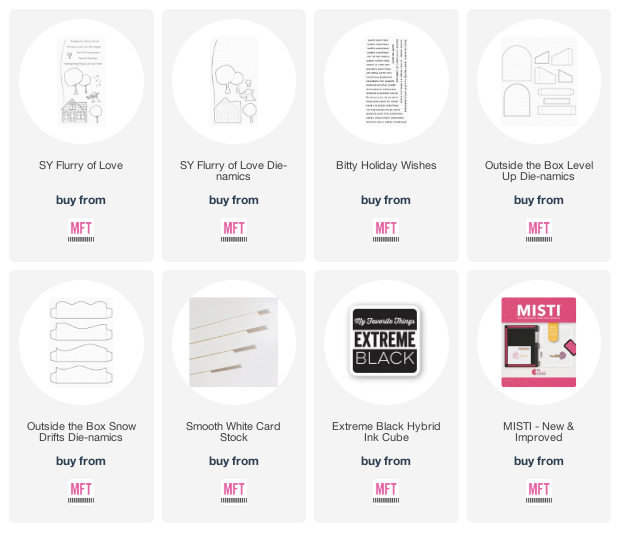
So for today's project i tried to do something different and that is to create a Clean and Simple Pop-up Box. Using the Flurry of Love by Stacey Yacula i did got close to it :). Voor mijn project van vandaag wilde ik weer eens wat anders proberen, ik maakte een Clean en Simple Pop-Up box met de Flurry of Love stempel van Stacey Yacula.
First i cut the backpanel out of watercolor paper and added a layer of Milled Lavender and Tumbled Glass, splattered some water and white paint. Cut the sides and four of the Outside the box snowdrifts out of Smooth White. Eerst stanste ik de achterkant uit aquarel papier en voegde een laag Milled Lavender en Tumbled Glass toe, spetterde water en witte verf. Stanste de zijkanten en vier van de Outside the Box Snowdrifts uit Smooth White.
Added some Tumbled Glass in two of the Snowdrifts and on the front one i stamped the sentiment. On the back snowdsrift i removed the side folds and added it straight to the panel after i added some blue under the trees. Voegde een laag Tumbled Glass op twee van de snowdrifts toe en stempelde de tekst op een van de snowdrifts. Van de achterste snowdrift verwijderde ik de plakranden en plakte hem zo op nadat ik wat blauw onder de bomen aanbracht.
Stamped all the images colored them up and cut them using the matching Die-Namics. Before coloring the tree i added a line what would be the snow. Adhered the box together and finished of added the images. Stempelde alle afbeeldingen, kleurde ze in met mijn Copic markers en stanste uit met bijpassende Die-Namics. Voordat ik de boom in kleurde maakte ik een "sneeuw" lijn met een zwarte fineliner. Plakte de box in elkaar en daarna de afbeeldingen.

Used Copic Colors:
Snow / Windows - B02, B00, B000, B0000, 0
Brown - E37, E35, E33, E31
Purple - BV04, BV02, BV00
Green - YG17, YG13, YG11
White - C3, C1, 0
Black - N7, N5, N4, N3

Have a lovely day!
Greets, Marieke

Krafty Peeks day 2: Handmade Sentiments

 Hello all,

Welcome back to Day Two of our November Krafty Peeks at Kraftin' Kimmie Stamps! Today we are sharing a set called Handmade Sentiments by artist Melissa. It's a fun and versatile stamp with so many sentiment stamps that you can use on all your handmade projects! Hallo allemaal en vandaag dag twee van de release week van Kraftin' Kimmie stamps. Vandaag laten we een stempel zien van artiest Melissa genaamd Handmade Sentiment Een mooie set met een aantal verschillende teksten die passen bij handgemaakte projecten.
So this set contains 16 different sentiments and two dotted lines were you can fill in your name. De set bevat 16 verschillende teksten en twee stippeltjeslijnen waar je jou naam kan opschrijven.

For my card i cut a topfold Smooth White cardbase and added some Copic Coloring on the bottom. Heat embost the four different sentiments on to four different colors of cardstock and cut them out. Voor mijn kaart sneed i topfolde Smooth White basiskaart en bracht er een Copic ondergrond op aan. Heat emboste vier verschillende teksten op vier verschillende kleuren cardstock en sneed ze uit.
Stamped the main image, colored it up and cut it using my Brother Scan & Cut. Added it to the card and finished everything of using some enamel dots. Easy to make and super fun to receive right! Stempelde de afbeelding, kleurde hem in met mijn Copic markers en sneed hem uit met mijn Brother Scan & Cut. Plakte het op de kaart en voegde wat enamel dots toe. Super makkelijk om te maken en leuk om te krijgen!

Have a lovely day!
Greets, Marieke

Paper: Smooth White, Black Licorice, Milk Chocolate, Sour Apple

You are invited to the Inlinkz link party!

Click here to enter

donderdag 19 november 2020

My Favorite Things - The Birthday Project Challenge

 Hello all,

Today i'm back with a project for My Favorite Things. It's third thursday of the month so that means a new Birthday Project Challenge starts. The challenge this month is to shake it, so anything that shakes in your project will do. Vandaag ben ik er weer met een kaart voor My Favorite Things. Het is de derde donderdag van de maand en dat betekend een nieuwe Verjaardag challenge start. De opdracht deze maand is om een shakerelement te gebruiken.
So as it happens today is my fathers birthday, a great excuse to make a card for him. And my dad is a totall coffee lover so how could i not use the Café all day Die-Namics together with the shaker pouches? Toevallig is het vandaag mijn vaders verjaardag een goed excuus om een leuke kaart voor hem te maken. Mijn vader is een grote koffie drinker dus de Café all day Die-namics met bijpassende pouches kwamen hier goed tot zijn recht.
Die cut a stitched Smooth White Rectangle, masked 2 cm from the bottom and added some Brushed Corduroy Distress ink to the bottom and top of the card. Stanste een stitched rechthoek uit Smooth White cardstock, maskeerde de onderkant met 2 cm en voegde wat Brushed Corduroy Distress inkt toe aan de onder en bovenkant van de rechthoek.
Stamped the Distressed Splatters using the same Distress ink and mixed it with water to splatter some more. Cut out the coffee cup and added some more Distress ink to the die cut piece so i would look like coffee. Stempelde de distress ink spetters met dezelfde kleur Distress ink en mixte wat van de kleur met water voor nog mee spetters. Stanste de koffiebeker uit en bewerkte het gestanste gedeelte met nog meer Distress ink zodat het op koffie lijkt.

Cut another Smooth White cardstock smaller then the main panel and temporarly adhered it to the back of the distressed panel. Traced the outline of the coffeecup shape, turned the panel around and traced the outside of the smaller rectangle. So i know were to place it back. Filled the shaker using beads, star and sequins and adhered the Distressed coffeecup to the smaller rectangle. Glued everything together. Stanste nog een rechthoek deze keer een slag kleiner. Plakte het tijdelijk op de ge-inkte rechthoek en tekende het gat van de koffiebeker over. Draaide het geheel over en tekende de hoeken van de kleine rechthoek over zodat ik weer waar ik de rechthoek terug moet plakken. Plakte de koffiebeker pouch aan de binnenkant van de grote rechthoek en vulde het met shakermateriaal. Op de kleine rechthoek stanste ik de koffiebeker op het afgetekende stuk en plakte het geheel aan elkaar.
Stamped the images, colored them up using my Copic markers and cut them using the matching Die-Namics. Adhered everything to a Tropical Teal topfold cardbase. Heat embost the sentiment on some Red Hot cardstock and cut it using a Banner die. Stempelde de afbeeldingen, kleurde ze in met mijn Copic markers en stanste ze uit met bijpassende Die-Namics. Plakte het geheel op een topfold Tropical Teal basiskaart. Heat emboste de tekst op Red Hot cardstock en stanste het uit met een banner stans.


Used Copic Colors:
White - C5,C 3, C1, C00, 0
Teal - BG09, BG18, BG15, BG13, BG11
Red - R59, R29, R27, R24
Black - N7, N5, N3
Hoofs - W5, W3, W1
Giraffe - E44, E43, E42, E41, E40, E35, E33, E31
Pink - R22, R20
Coffeecups - E44, E43, E42, E41

Have a lovely day!
Greets, Marieke

Krafty Peeks day 1: Save my Place

 Hello All / Hallo allemaal

Welcome to Day One of our November Krafty Peeks at Kraftin' Kimmie Stamps! Today we are sharing a set called Save my Place! by artist Melissa. It's a fun and versatile set! Hallo allemaal bij dag één van de release week van Kraftin' Kimmie stamps. Vandaag laten we een stempel zien van artiest Melissa genaamd Save my Place
The set Contains six different animals, two accessories and five matching sentiments. De set bestaat uit zes verschillende dieren, twee accessoires en vijf bijpassende teksten.

Today we are also shocasing two new stencils, one new Krafty Ink and a new set of Krafty Dots! Vandaag laten we eveneens twee nieuwe stencils, een nieuwe Krafty inktkleur en een set met Krafty Dots zien!

For my card i cut a topfold Smooth White basecard and masked of 2 cm of the bottom. Added some Salty Ocean and temporarly added the Splish Splash stencil and inked up anther layer of Salty Ocean. Voor mijn kaart sneed ik een topfold Smooth white basiskaart en maskeerde 2 cm vanaf de onderkant. Bracht wat Salty Ocean en plakte tijdelijke het Splish en Splash Stencil op. Inkte nog een laag Salty Ocean Distress inkt.
Stamped the images, colored them up using my Copic Markers and cut them using my brother Scan& Cut. Added it to the card, stamped the sentiment and added some enamel dots. To finish of the card i added some glossy accent on to the glasses. Stempelde de afbeeldingen, kleurde ze in met mijn Copic markers en sneed ze uit met mijn Brother Scan & Cut. Plakte het op de kaart, stempelde de tekst en voegde wat enemal dots toe. Maakte het geheel compleet met wat Glossy Accent op de bril.

Have a lovely day!
Greets, Marieke

Ink: Wicked Black, Salty Ocean
Paper: Smooth White
Extra: Splish and Splash Stencil, Enamel Dots, Glossy Accent

You are invited to the Inlinkz link party!

Click here to enter

dinsdag 17 november 2020

MFT Miss Your Hugs Card Kit Release

 Hello all,

The day is here that the Miss Your Hugs card kit release by My Favorite Things is avaible! What do you think is it beautiful or what? So what is ending up in your shopping cart? Watch your budget but have fun shopping! De dag is aangebroken dat Miss Your Hugs card kit release van My Favorite Things verkrijgbaar is! En wat vond je ervan schitterend toch? Welke producten belanden bij jou in het mandje? Let op je budget maar heb vooral plezier met winkelen!
For my last card i decided i want to use the earth stamps. So after some thinking this is what i came up with. Voor mijn laatste kaart besloot ik dat ik de wereld stempels wilde gebruiken. Na wat nadenken kwam dit uit mijn handen.


First i made the background using Broken China, Chipped Sapphire and Black Soot Distress ink. Splattered some water and white paint and cut the panel using a Stitched Rectangle Die-Namics. Starte met het maken van de achtergrond met Broken China, Chipped Sapphire en Black Soot Distress inkt. Spetterde water en witte verf en stanste het geheel met een Stitched Rectangle Die-Namics.
Stamped the earth using Summer Splash and Jellybean Green, the mappins in Red Hot and the paper plane with Extreme Black. Colored up the plain using my Copic markers (C5, C3, C1) and cut all the images using the matching Die-Namics. Glued the Distress ink panel on to a sidefold Smooth White base card. Stempelde de wereld met Summer Splash en Jellybean Green, de mappinnen met Red Hot en het papieren vliegtuigje met Extreme Black. Kleurde het vliegtuigje in met mijn Copic markers (C5, C3, C1) en stanste de afbeeldingen uit met de bijpassende Die-Namics. Plakte het Distress ink paneel op een sidefold Smooth White basis kaart.
Placed the images on the card and before glueing the right earth i stamped the heartline. Heat embost the sentiment on some Black Licorice and added it to the card. Plakte de afbeeldingen op de kaart, voordat ik de rechter aarde op plakte stempelde ik eerst de hartjes lijn. Heat emboste de tekst op Black Licorice cardstock and voegde het toe aan de kaart.

Have a lovely day!
Greets, Marieke

maandag 16 november 2020

MFT Miss Your Hugs Card Kit Release Countdown day 1

Hello all,

Welcome back today for day two of the November Cardkit Release countdown by My Favorite Things. Lucky the wait on the Cardkit Release is only short and you can have a shopping spree already tommorow Tuesday November 17th at 10:00 am EST. Welkom terug bij dag twee van de november cardkit Release countdown by My Favorite Things. Gelukkig hoef je maar even te wachten want morgen zijn ze al beschikbaar om 16:00!
So for today's card i decided to go CAS, that is what i really like about this kit is that you can make any kind of cardtype and you are aible to mass produce if you like.


Voor de kaart van de vandaag besloot ik voor een CAS kaart te gaan, dat vind ik namelijk aan deze kit erg leuk is dat je er allerlei soorten kaarten mee kunt maken en je kunt ook nog eens een massaproductie doen.
So for today's card i cut a Summer Splash a2 tofold cardbase and stamped the Four Corners Background on to it using Summer Splash Dye ink. Cut out the Computer from the Let's Connect Die-Namics out of Smooth White and the screen out of Black Licorice. Heat embost the sentiment on to the screen. Voor de kaart van vandaag sneed ik een topfold Summer Splash a2 basiskaart. Stempelde met Summer Splash Dye ink de Four Corners achtergrond stempel op de basis. Stanste de computer uit de Ler's Connect Die-Namics van Smooth White en het scherm van Black Licorice. Heat emboste de tekst op het scherm.
Die cut the Love Speech Die-Namics out of Red Hot and Smooth White and made them into one. Stamped the sentiment on to the base card and my card is all done! Stanste de Love Speech Die-Namics uit Red Hot en Smooth White en maakte ze compleet. Stempelde de tekst op de basiskaart en de kaart is klaar!

Have a lovely day!
Greets, Marieke

zondag 15 november 2020

MFT Miss Your Hugs Card Kit Release Countdown day 2

Hello all,

Today we are kicking of with a amazing Card kit release countdown by My Favorite Things! With the pandamic (and even after all is this is over) in mind i think this is a great card kit! This release will be avaible Tuesday November 17th at 10:00 am EST. Vandaag starten we met een super leuke cardkit release countdown van My Favorite Things! Met de pandemie (uiteraard kun je de prodcuten voor zoveel meer gebruiken!) in gedachte is dit een super leuke moderne card kit! De release zal beschikbaar zijn op dinsdag 1november om 16:00 
So this cardkit contains two stamps (one of them is card kit exclusive!), for the big stamp there are is the Miss Your Hugs matching Die-Namics, Confetti All Around Die-Namics, Happy Rainbow Die-Namics, Confetti All Around Stencil, Long Distance Hugs Friendship Tokens, Five piece of Smooth White cardstock, and nine different colors of cardstock. And if you buy for $60 you will get the Love Speech Die-Namics for free!


De cardkit bestaat uit twee stempels (één daarvan is Kit-exclusief!), voor de grote stempel is een bijpassende Miss Your Hugs Die-Namics, Confetti All Around Die-Namics, Happy Rainbow Die-Namics, Confetti All Around Stencil, Long Distance Hugs Friendship Tokens, vijf vellen Smooth White cardstock en negen vellen verschillende kleuren cardstock. Wanneer je voor $60 koopt krijg je de Love Speech Die-Namics gratis.
For my card i cut a topfold Smooth White cardbase and stamped the Paint Splatter Background on to it with black ink. Die cut the middle seize rainbow out of the colors Summer Splash, Sour Apple, Lemon Drop and Orange Zest. And placed them randomly on my card. Cut the hearts from the Love Speech Die-Namics and placed them in the middle of the rainbow. Voor mijn kaart sneed ik een topfold Smooth White basiskaart en stempelde er de Paint Splatter Achtergrond stempel op met zwarte inkt. Stanste de middelste maat regenboog uit de kleuren Summer Splash, Sour Apple, Lemon Drop and Orange Zest. En plakte de regenbogen willekeurig op de basis. Stanste uit de Love Speech Die-Namics het hartje uit Red Hot en plakte dit in het midden van de regenbogen.
Heat embost the sentiment on some Black Licorice cardstock and cut it using a circle die. Die cut a Speech bubble heart out of Red Hot cardstock and added it to the sentiment. Finished the card of using Liquid Applicator on all the hearts. Heat emboste de tekst op Black Licorice en stanste het uit met een cirkel Die-Namics. Stanste een Love Speech bubble uit Red Hot en voegde dit aan de tekst toe. Werkte de kaart af door op alle harten liquid applicator te doen.

Have a lovely day!
Greets, Marieke